Canon R6 Mark II High ISO Test
WRITTEN BY: BRUCE LOVELACE
UPDATED ON: July 6, 2024
You're trying to find out how the Canon R6 Mark II performs when it's set to high ISO settings. I wanted to know too, so I did my own R6 Mark II high ISO test. My test included photographing a test target and taking "Real World" test photos of everyday subjects in varying situations. I shot the tests using medium, high, and super high ISO settings on my R6 M2.
The results I got from my test of the R6 Mark II at extreme ISO settings blew me away. I photographed the horse race below at night with my ISO set at 40,000. I was thrilled with the results. To be able to shoot in such harsh and dim lighting conditions and come away with solid quality photos using my R6 mark II and its 24-105 f/4-7.1 kit lens is a game changer.
The sample photo below is the unedited image I got shooting at 1/500 second at f/7.1. I also ran the image through Topaz DeNoise AI in Photoshop. You can see the subtle improvement is image quality by moving your cursor on and off the image. (You may need to be viewing it on a large screen to see the difference).
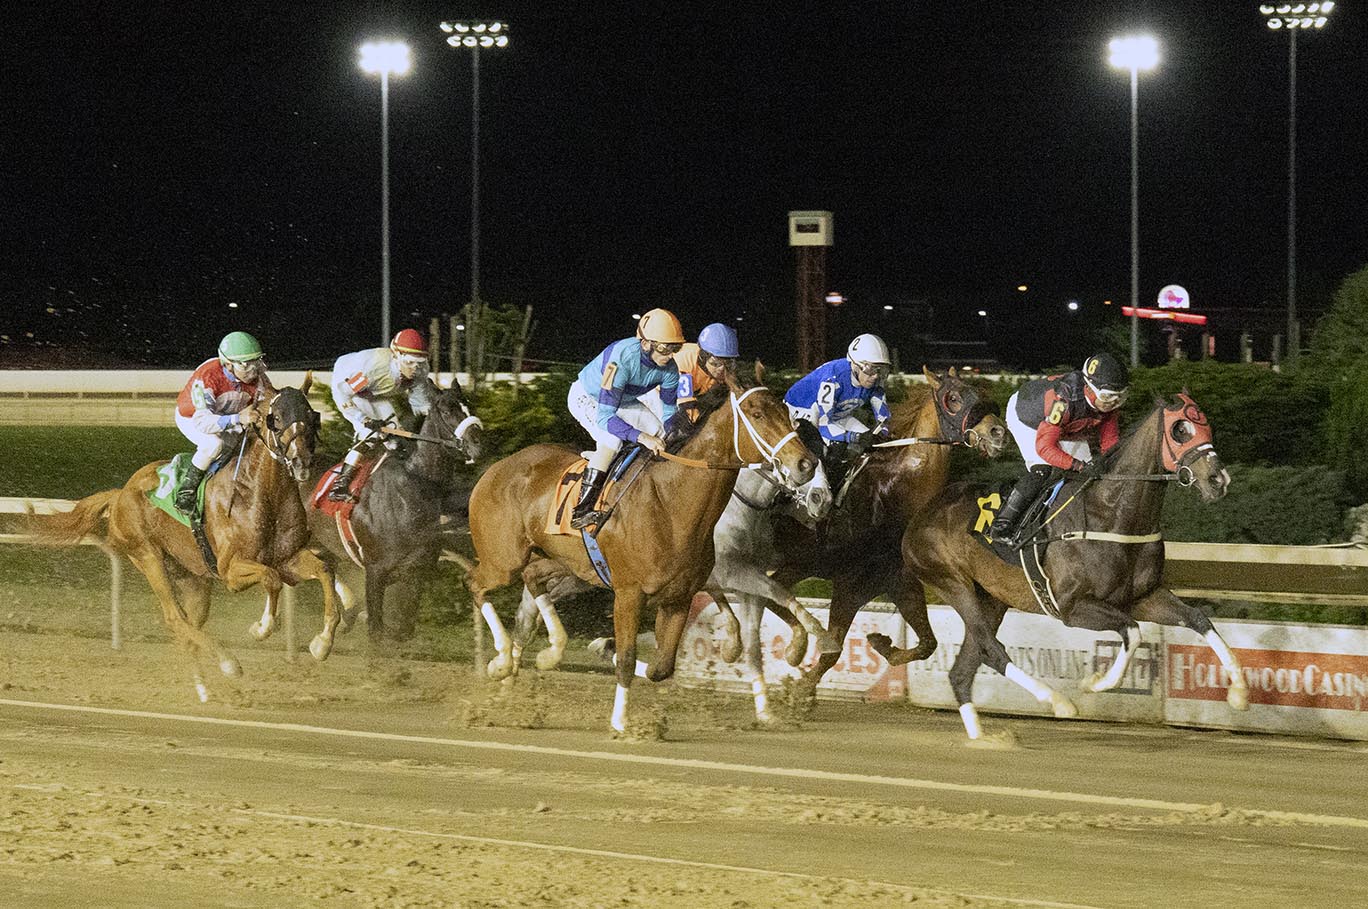
TEST RESULTS: You're going to be very pleased with how well the R6 Mark II does when shooting photos under dim lighting conditions. Noise levels are remarkably low and image quality is pleasantly high. When you add noise reduction that's built into the camera's software, or use editing software afterwards, you get the ability to use "Super High" ISO settings to take photos that you couldn't have otherwise with older model cameras. I intentionally formatted this article with a wide format and high resolution photos from my R6 Mark II , so that YOU can see the test photos better. I recommend that you look at his post with the largest LCD screen you can. sincerely hope this helps you.
You can see additional photos taken with my R6 Mark II here.
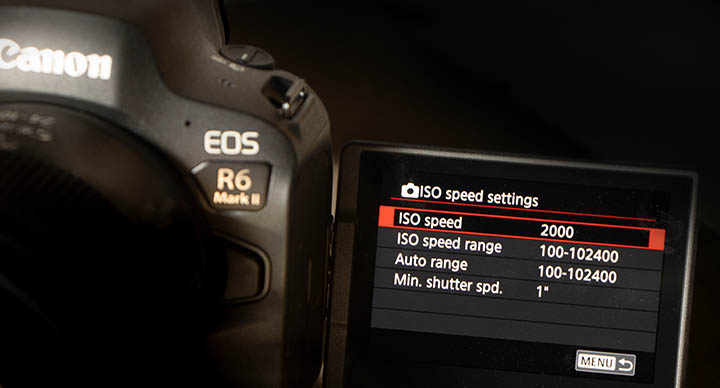 You can set your R6 M2 to a high ISO in the menu
Your acceptable image noise tolerance will be different than mine, but I was truly stunned by how well the R6 Mark II's new 24 MP sensor and Digic X processor handled dim lighting conditions, both in terms of ISO performance and focus tracking. Results were similar, but even better than what I got with my Canon EOS R ISO test.
One of the disadvantages of jamming millions and millions of pixels onto camera sensors is that the pixels have to made tiny in order to all fit. Tiny pixels are not as efficient at collecting light and the electrical signal from the sensor has to be amplified more. That results in digital noise. The R6 Mark II has just the right number of larger pixels, compared to ultra high pixel sensors, to avoid excessive noise. Couple that with its advanced Digic X processor and you're in a sweet spot for image quality.
 UPDATED: I took this group photo yesterday in dim lighting conditions.
I Would not have wanted to do this with my older Canon cameras.
The Canon R6 Mark II performed well at ISO 800
Why High ISO Matters
High ISO performance is important for several reasons. You want the best image quality in all the photos you take and ISO you choose has a big impact on how good your images look. You want to be able to take high quality photos is less-than-perfect lighting conditions.
Setting the ISO on your R6 Mark II can have a big effect on your other camera settings, like shutter speed and f/stop. There are advantages and disadvantages you need to know about when it comes to setting the ISO higher. Let's look at all of the pluses and minuses of setting your camera's ISO to higher levels.
advantages Of Using a High ISO
High ISO is not your enemy. There are many advantages of setting the ISO to a high number on any camera, including the R6 Mark II. Higher ISO makes it possible to shoot in dim lighting conditions where you couldn't have been able to previously. Using a high ISO means that you don't need as much light to strike the sensor during picture taking to get a properly exposed photo. This gives you the power to use a faster shutter speed and/or a smaller f/stop if you want.
Higher ISO settings can potential help you in the following ways:
- Shoot sports, wildlife, and other action photos with a faster shutter speed and be able to "freeze" the action and not have any blurriness from your subject moving.
- Shoot a handheld photo without having to use a tripod because of a slow shutter speed. You can use faster shutter speeds and avoid blur from camera shake.
- Shoot in dimly lit situations without using a flash. It will be easier for you to do indoor photography, nighttime photography, and astrophotography.
- Use a smaller aperture (higher f/stop number) to get more things in the scene in sharp focus, also known as deeper depth of field.
Disadvantages
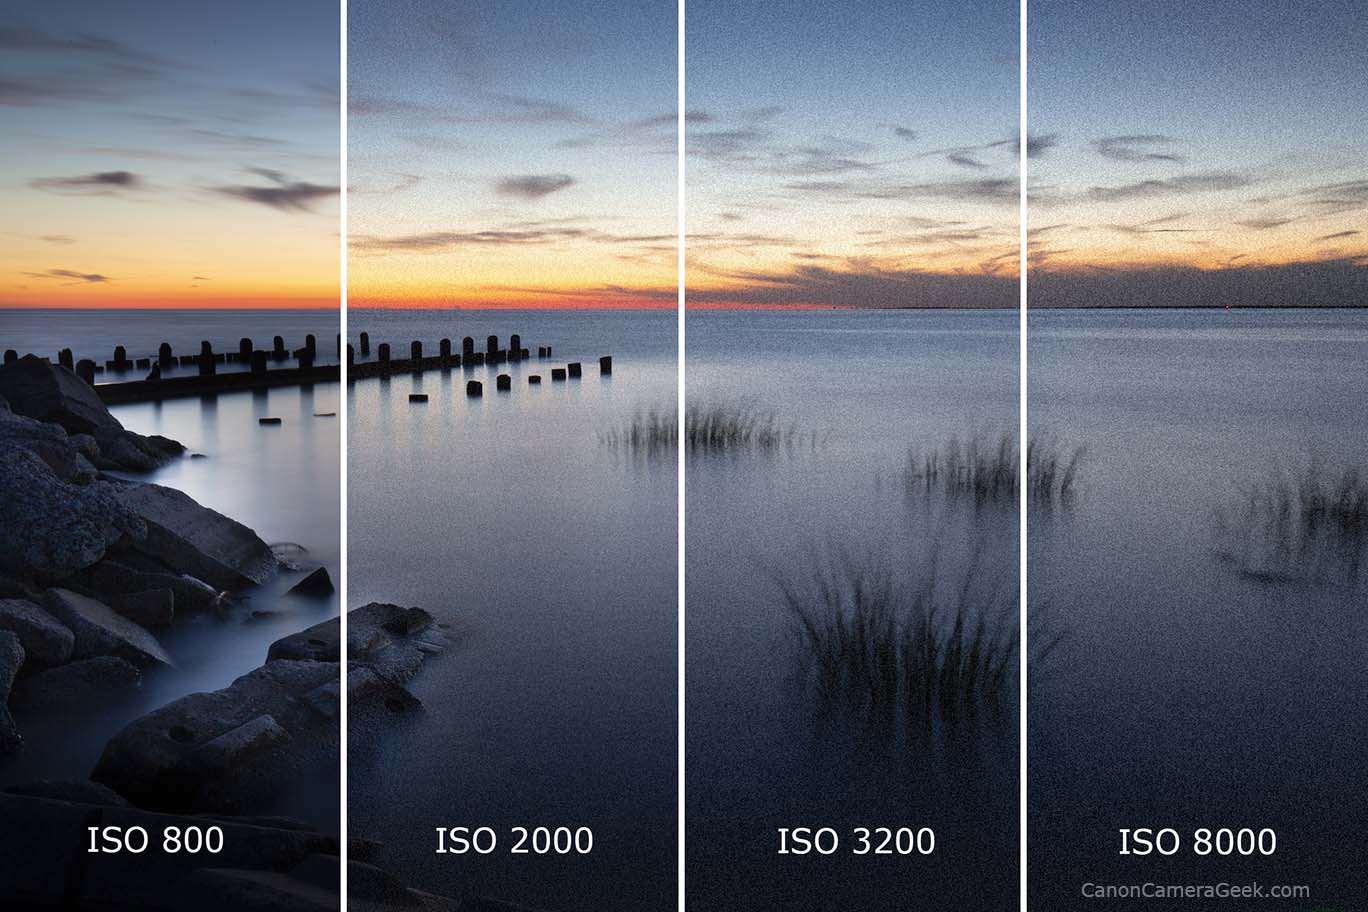
The biggest drawback is the loss of image quality. The high ISO comparison illustration below will help you understand what the potential disadvantages of using high ISO. The ocean scene was NOT shot with the R6 Mark II. Reduced image quality (IQ) shows up as a grainy look to your photo. The higher your ISO setting then the more noise and reduction in sharpness you get.
As mentioned I tested the high ISO performance with the R6 Mark II in both real world photography and with using a color test target. I found the test using a color target was of very limited value. I prefer to do field tests on lenses and cameras to be more valuable and relevant to use, but I did both and the results are below.
R6 MARK II HIGH ISO Color Target TEST
I photographed a color test target with a sharp Canon EF 100mm lens attached to my R6 M2 mounted onto a sturdy tripod. I used the camera's self timer, shot all of the photos using aperture priority and a constant aperture of f/8 on all the test photos. You're seeing the side-by-side cropped images below at 6 different ISO settings. Interestingly, noise shows up much more in the cooler blue and green tones then it does in the warmer yellow and red tones.
 ISO 800
 ISO 1600
 ISO 3200
 ISO 6400
 ISO 12800
 ISO 25600
Real World R6 Mark II High ISO Test
You also want to know how the R6 Mark II does when you use high ISO settings for your everyday photos, not just test targets. I've found that noise is more visible in those solid darker areas of your photos where less light has hit the sensor. As you'll see in the high ISO comparisons below, Noise doesn't show up much at all, except in larger solid areas. If you look at the solid color patches on my color test target, you'll see the noise show up more significantly than with the everyday photos.
Sample R6 Mark II High ISO Photos
Here is a sequence of sample photos that I've taken using my R6 Mark II at various ISO levels. The first ISO sample is at 800 and the last sample was taken at a whopping ISO of 8000.
ISO 800
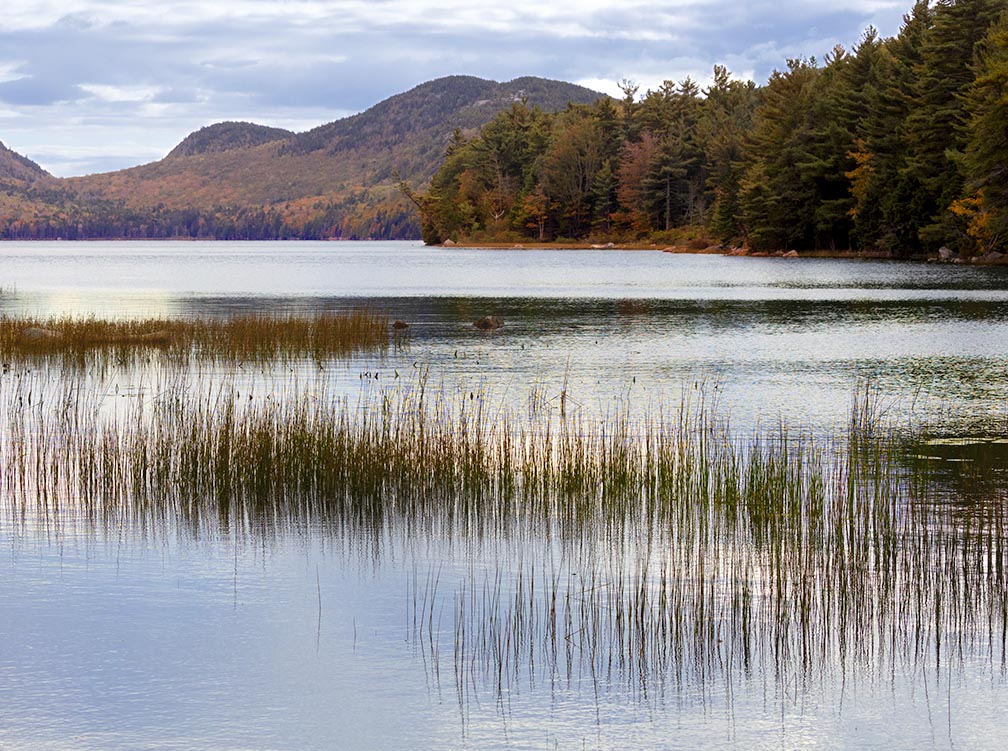
Despite it being outdoors in the middle of the day, it was heavily overcast when I took this photo of Eagle Lake in Acadia National Park. To get a big enough depth of field and keep the foreground grasses and distant mountains in sharp focus, I needed a small aperture. To freeze the movement of the blowing pond grass and prevent motion blur and camera shake I needed a fast shutter speed. To satisfy both of these need in the dimly lit scene I elevated the ISO to 800. That gave me what I needed to get a 1/800 second exposure at f/10.
 Eagle Lake in The Fall
ISO=800, 1/800 second at f/10
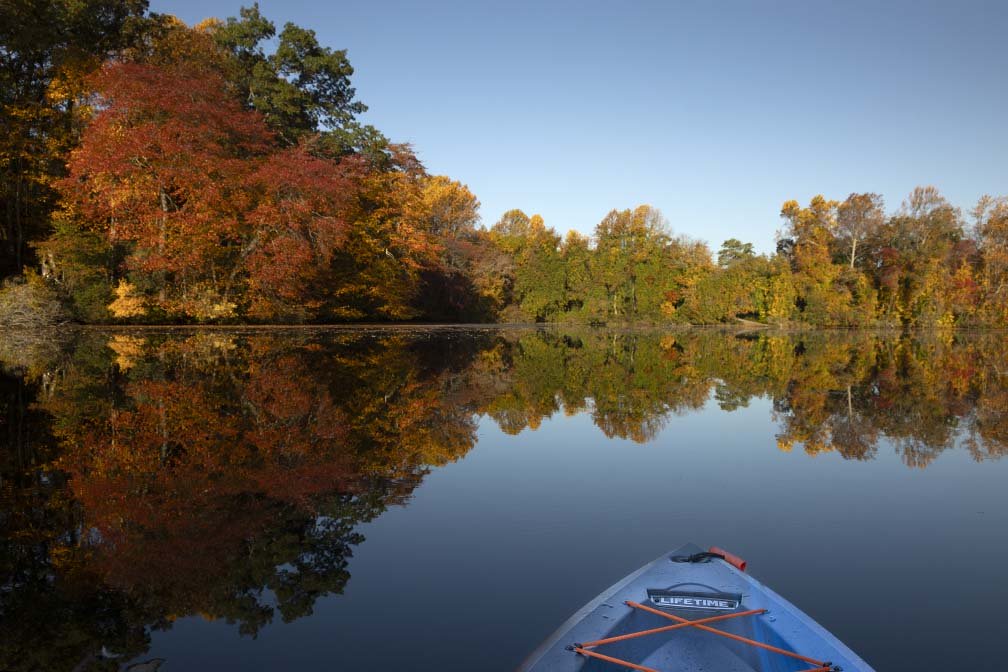
This photo of the Fall lake scene above was taken with my camera set to an ISO of 800. The resulting photo had no visible digital noise and was perfectly sharp. I did do some enhancements to the colors in the mountains and the lake reflections in the foreground.
ISO 1250
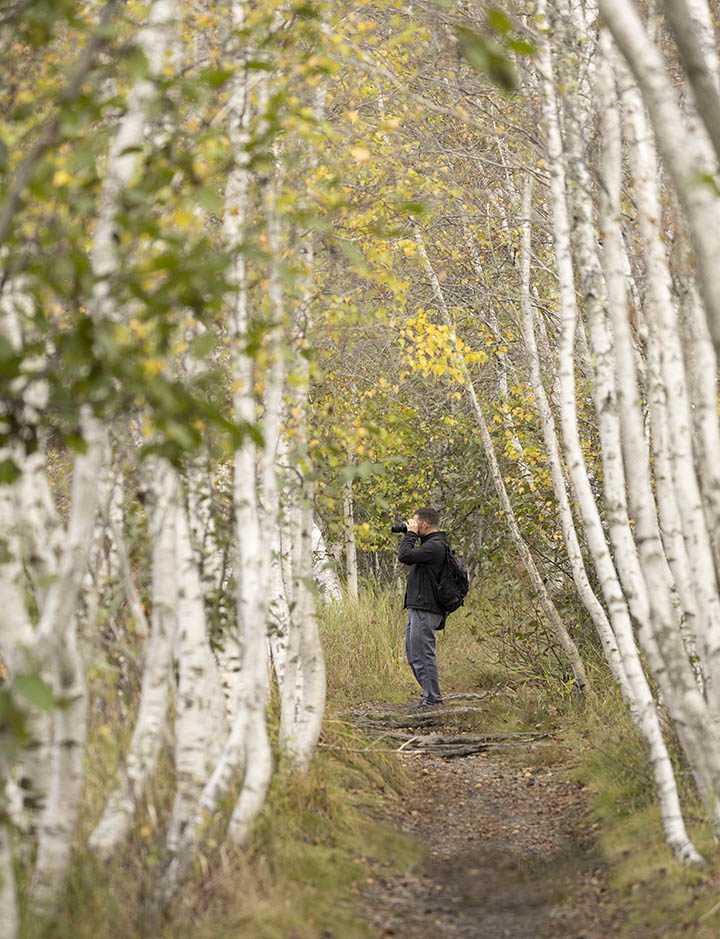
In the photo of the photographer below I didn't "need" to shoot at an ISO of 1250. but I wanted to test this camera at an ISO higher than ISO 800 which used to be my upper limit when shooting beach portraits for many years using my Canon 5D Mark III. I wanted to use a large aperture to intentionally blur the focus in the foreground. That gave me a super fast shutter speed 1/2000 second which I didn't need in this situation, but I sure didn't have to worry about any blur from motion.
ISO 2000
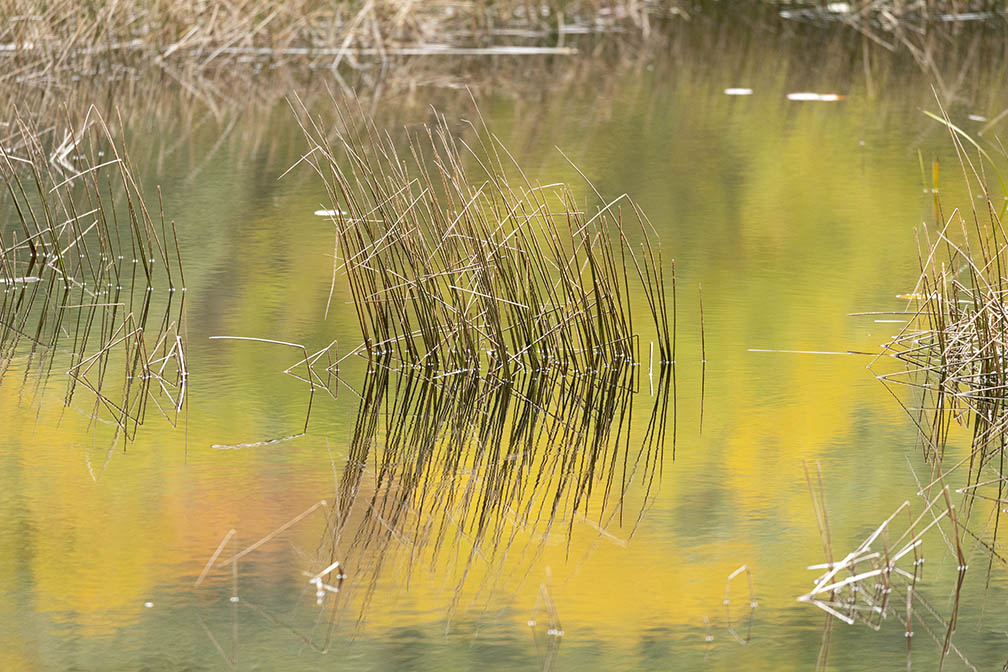
I never would have photographed the scene below, with my 5D Mark III or my 90D and my 100-400mm lens at ISO 2000 using a handheld technique. I would have had to set up my tripod and used a lower ISO setting coupled with a slow shutter speed to get a high quality photograph. The remarkable high speed performance of the R6 Mark II enables me to shoot landscapes handheld without a tripod in many situations that before would have previously resulted in poor image quality.
 Acadia, The Tarn at ISO 2000
Handheld Canon R6 Mark II, EF 100-400mm IS II lens @ f/5.6 for 1/320 second
Being able to shoot landscape photos without a tripod in the early morning and late evening hours allows me to shoot more productively and still get the image quality I want at ISO 2000.
ISO 3200
One of the most challenging low light shooting situations occurs when you're shooting a fast-moving target/ This carnival carousel was moving these kids at a good pace. I need a fast shutter speed to prevent motion blur and I needed a little bit of depth in the focus to make sure both the kids and their cycles were sharp.
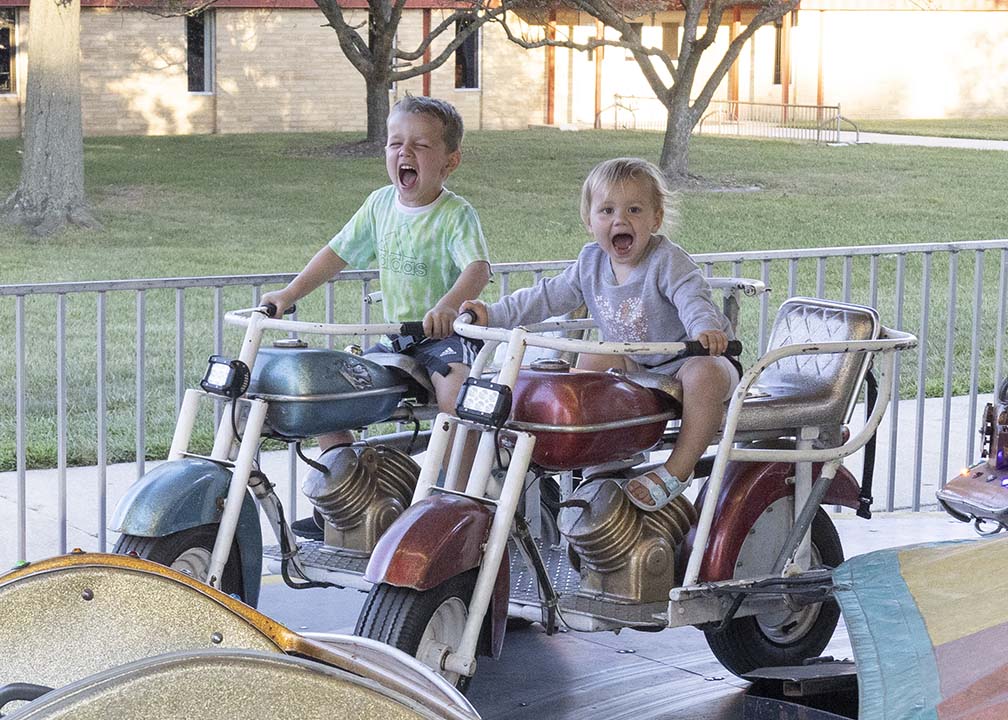 "Carnival Fun" ISO=3200, f/8.0 at 1/800 second
R6 Mark II high ISO test
At ISO 3200, the noise is more observable, but the details are still surprisingly sharp. Colors in images are still accurate, but there is a loss of a little saturation. This is a good ISO setting to use if you need to shoot in very low light and you don't mind small amounts of noise.
ISO 8000
My first Canon DSLR, the D10 had a maximum extended ISO setting of 3200 and it gave me dreadfully noisy images. To have the much higher ISO capabilities like 8000 and give me a photo like the one below is remarkable. My Canon speedlights are likely to start gathering dust now.
 "Ferris Wheel Adventure" at 1/60 second
"Super high" ISO=8000 f/9 @ 1/60 second
NO noise reduction software used.
It was practically dark when I took this high 8000 ISO photo. The only light hitting my subjects came from the carnival ride lights. The Ferris wheel was moving slowly, so I was able to shoot at 1/60 second and avoid any significant blur from motion. Just a few years ago, shooting at ISO of 8000 would have resulted in golf ball-sized noise.
I applied a small amount of noise reduction and sharpening using Topaz Denoise to the photo and the resulting image below is more than enough image quality to please any photographer under such dim shooting situations.
 "Ferris Wheel Adventure" at 1/60 second
Noise reduction software used.
Canon R6 M2 photo at ISO 8000
R6 Mark II Noise Reduction
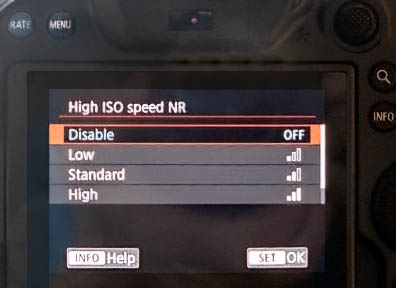 R6 Mark II in-camera noise reduction setting
How can we fix the noise that comes along with shooting high ISO photos with your R6 M2? We all want to avoid digital noise in our photographs, but there are situations where it may show up and you'll want to reduce it. Fortunately, you have two effective ways to reduce or eliminate noise.
You can use the noise reduction (abbreviated as NR) feature that's built into your R6 Mark II camera, or you can use software on your computer to both reduce noise and sharpen your noisy images.
IN CAMERA: You can see in this photos that the Canon R6 Mark II camera has 4 different levels of NR. You can disable it completely, set it on low, put it on standard, or use the high setting for significant noise reduction. Two disadvantages to in-camera NR are that you don't have fine control on the amount of reduction, or the specific areas of your photograph, that you want edited. Additionally, you can lose sharpness to some extent, depending on the area of the photograph, as well as the amount of noise showing up in your image.
The best part of using the noise reduction feature built into your R6 Mark II is that it's super convenient. You can just "set it and forget it." It takes a little experimentation on your part to learn what NR setting works best for you in different situations. The best way to learn it is to use it. Take photos with NR disabled, then at different levels so that you can compare the different results
IN COMPUTER: I choose to do any needed editing post-capture rather than in camera. I'm a control freak. I shoot everything in Raw mode so that I can do simple or sometimes complex editing with sophisticated software. The industry standard is Photoshop, of course, but there are many other option available options. When it come to noise reduction, I use Topaz DeNoise AI.
I also did my own controlled test shooting the same color target with noise reduction on and with it off. The results confirmed for me personally, that I prefer to do it with software, where I can zoom in close with each image on my large computer screen. Then I can make fine adjustments to everything, including noise reduction.
After testing the R6 Mark II at ISO of 2000 I've determined that I'll have no qualms shooting all types of photos at an ISO of 2000 for any type of photography. Of course, I'll still shoot at lower ISO setting as much as I can, to eliminate any chance of having a little noise show up in shadow areas of my images.
Conclusion
The Canon R6 Mark II is a great camera for shooting photos in dimly lit situations. You can use higher ISO settings on your R6 Mark II to get sharper photos with the resulting faster shutter speeds or smaller apertures. The best way to evaluate camera equipment for performance of a particular feature like high ISO settings is to test it shooting the types of subjects you want to shoot, NOT test targets.
If you want to reduce the digital noise in super high ISO situations, you can use the convenient R6 M2 noise reduction setting at different levels to get the results you want. Alternatively, you can use software on your computer and get amazing results with ISO settings as high as 6400 and 12800.

Bruce Lovelace is the publisher of Canon Camera Geek. Read more about him on the About Page. He also publishes how to articles and camera gear reviews at the Photography Tips website.
View some of Bruce's photos on Instagram and Flickr. Join the tribe of followers on YouTube. Bruce also runs photo workshops and provides 1 on 1 digital photography coaching. Canon Geek on Google My Business
