Long Exposure With a Canon Camera
Your Canon camera is equipped to make some remarkable long exposure photos. This post will explain what settings to use and give you all the tips you need to know to be successful with long exposure photography.
What is long exposure
Before we dive in deep to the specific approach to use, you'll want to know specifically what is meant by long exposure. Long exposure photography is the technique where the camera's shutter is kept open for relatively extended periods of time to capture visually interesting effects caused by movement of objects or the passage of time as the photo is made.
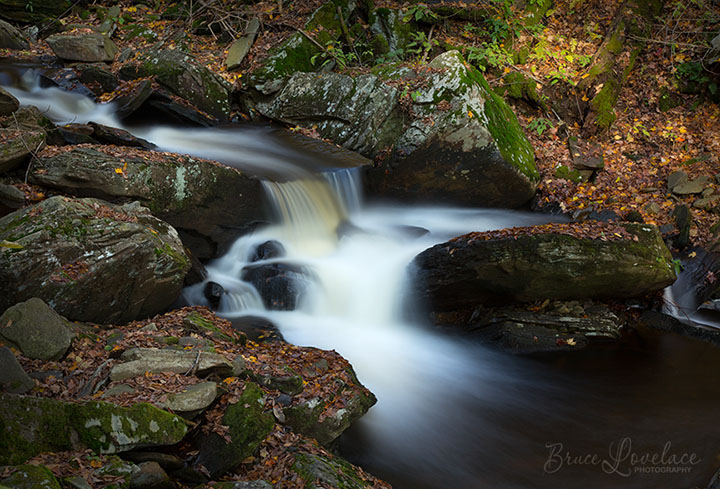
There is a misconception that long exposure photography means that both stationary objects and moving objects are always included in your composition. Not true! It is true that such combined compositions often make for interesting photos like this one I shot of this mini waterfall at Ticketts Glen in southeast Pennsylvania.
I like to use a broader definition of long exposure photography as I don't want to diminish my creativity by excluding lots of possibilities for creating visually interesting images.
In the abstract photo below, my Canon 5D Mark III was set to 1/10 second shutter speed. With it mounted to a tripod, I tilted my camera downward rapidly as I took the photo.
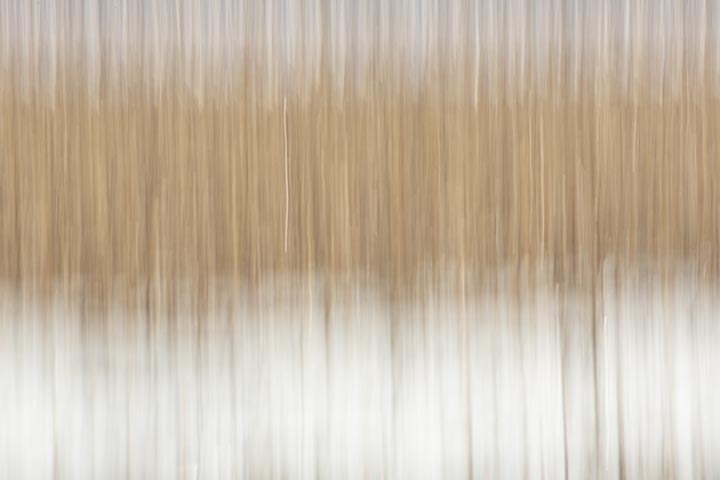 Creative effect achieved with a "short" long exposure of 1/10 second
Canon EF 100-400 lens @ f/32, ISO=100
The white area at the bottom of the photo is actually a large flock of snow geese resting in a field and the brown area is the motion-blurred wooded area behind the field.
How Long Is Long Enough
Many consider the minimum long exposure to be a few seconds to several minutes or even the extreme of hours for the photo to qualify as long exposure.
I like the effect I achieved with the abstract photo above. The exposure was 1/10 second, which is 10 or 15 times longer than a regular, typical outdoor daytime photo (1/125 or 1/160 second). I used intentional and significant camera movement when I took the photo to create the abstract blur.
Compare that with the small waterfall photo above that where I used a more commonly used shutter speed of a few seconds long to get the creamy water effect.
photographer's examples of Long Exposure
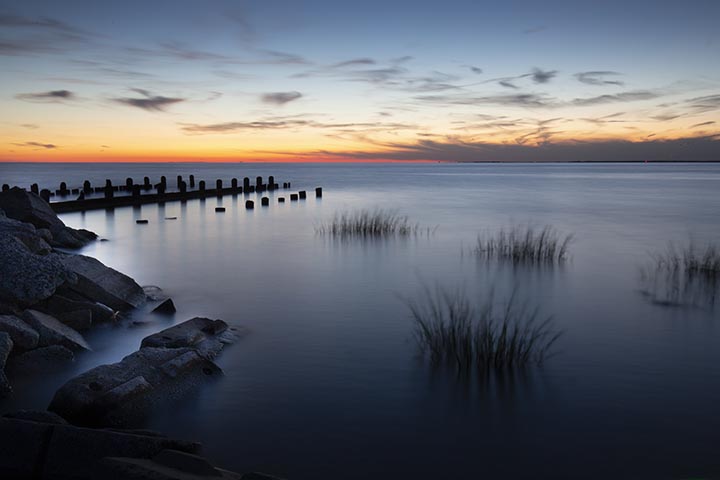
The example below shows you the outcome you get when using a 30 second exposure of ocean waves. The ocean water looks like a large smooth lake just after sunset on a windless evening.
Scenes with moving water are perhaps the most popular subject to photograph when using the long exposure shutter speed technique.
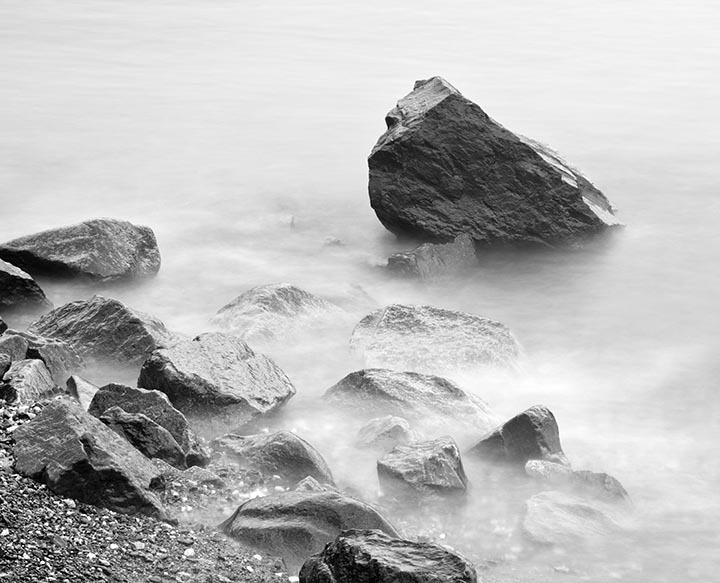 "Susquehanna River Rocks"
Daytime photo taken with Canon 70D
8 second exposure, f/16, ND filter, ISO=100
How To Take Long Exposure Photos
By this point, you're probably wondering how to take long exposure photos, what camera settings to use, and what equipment is needed. Fortunately, you can experiment and adjust settings based on the results you see on the LCD screen when you play back after each image you take.
We'll look at camera gear in a minute, but first, here is what you need to know about camera settings and long exposure photography.
Camera settings
You can any one of four different exposure settings with your Canon and still get great results with long exposures. The subject matter and the amount of light in the scene in front of you dramatically effect the technique you use.
Program mode and fully automatic exposure modes won't be effective to use. You can select shutter priority, aperture priority, manual, or bulb mode.
shutter speed Priority
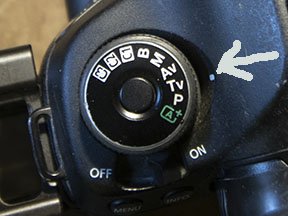 Shutter Priority
The recommended shutter speed for long exposure photography varies greatly. The biggest factors in determining the best shutter speed is the amount of light present in your scene, the speed of any moving aspects within your composition, and how much blur you want to achieve.
The preferred camera setting for many long exposure shooters is often shutter priority mode. You set the shutter to a long amount of time to get the amount of motion blur you want, say 5 seconds. This is a good starting point for night time and similar long exposures The camera will select the right f/stop to give you the correct exposure.
Once you see the results you can easily lengthen or shorten the exposure in shutter priority and the camera will adjust to compensate.
aperture Priority
Aperture priority is a lesser used exposure mode for long exposures, but you can use it if you pay attention to the resulting shutter speed that your camera determines. Aperture priority is a useful setting on your Canon helpful when you need to control the depth of field.
Use one of the smaller apertures to start with like f/16 or f/22. This will give you a deep depth of field to insure everything in your photo is in sharp focus.
Manual Exposure Mode
Once you get some initial experience with shooting these type of photos in a few situations, you may wish to go straight to setting the aperture (f/stop #) and shutter speed and allow the camera to pick the ISO automatically.
If you can't get the shutter speed and aperture value you want, you may have to add an ND filter or polarizing filter to cut down on the amount of light getting through to your sensor.
BULB Mode
The way bulb mode works is that you manually trigger the shutter to open, with a shutter cord or a remote, and manual push the trigger again to close the shutter after a desired length of time.
The only time you must use bulb mode is when you want an exposure of longer than 30 seconds. That is the maximum limit on most pre-set shutter speeds with cameras, including Canon.
iso
Start with a low ISO, such as 100 or 160. This will give you better image quality than a higher ISO setting. Additionally, lower ISO settings will correspond to slower shutter speeds because of the larger amount of light needed to hit the camera sensor for a proper exposure.
You may have to raise the ISO higher if your initial test photos are too dark, if your apertures are too wide open and you have focus issues, or if your shutter speeds are too slow.
EQUIPMENT
The two useful accessories to use with your Canon camera for getting good long exposure photos are a tripod and at least one neutral density filter.
Tripod
Tripods are the number one require accessory for shooting long exposure photos. Certainly, you can get creative with moving the camera during a long exposure-my snow geese photo above, it's easier to get successful results with your camera mounted to a sturdy tripod.
To insure that there are parts of your subject that are perfectly sharp and free from motion blur, use your camera's self-timer, use a shutter cord, or a remote trigger device like your phone with the right Canon app.
Neutral Density Filter
Screw-on neutral density filters (ND filters) are very useful to cut down the intensity of light that passes through to hit your camera sensor without affecting the color balance of your photo. The reduced brightness enables you to use long exposures without overexposing your images.
ND filters come in different strengths. I've found that for the type of long exposure photos I shoot that 4-stop and a 10-stop neutral density filters are the most useful.
You can also get variable ND filters, but some photographers report that image quality may suffer a bit when using these, especially with color shifts in highlight and reflection areas of your photo.
Polarizing filters can be substituted for ND filters as an alternative way to reduce the light entering the camera, but they'll only reduce the light by up to two f/stops.
Interesting Subjects For Long Exposures
You've already seen a few examples of water as a good subject to use this technique with. What else makes for visually interesting extended exposure times? Let's take a look at a few ideas for long exposure photography.
Any night scene that has moving lights is a potential for getting an interesting shot.
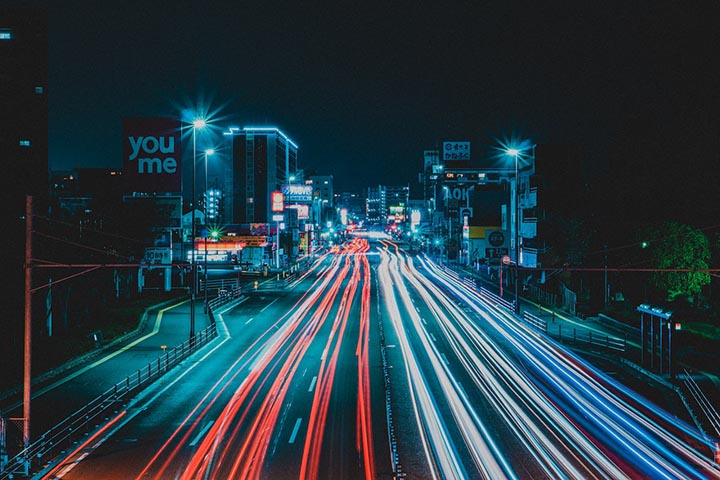 Light Trails Long Exposure. Photo by Sơn Bờm on Pexels
Similar to the "light trails" image above, carnivals make a great subject with moving lights to photograph. Particularly at nighttime or at dusk you can get some fascinating images.
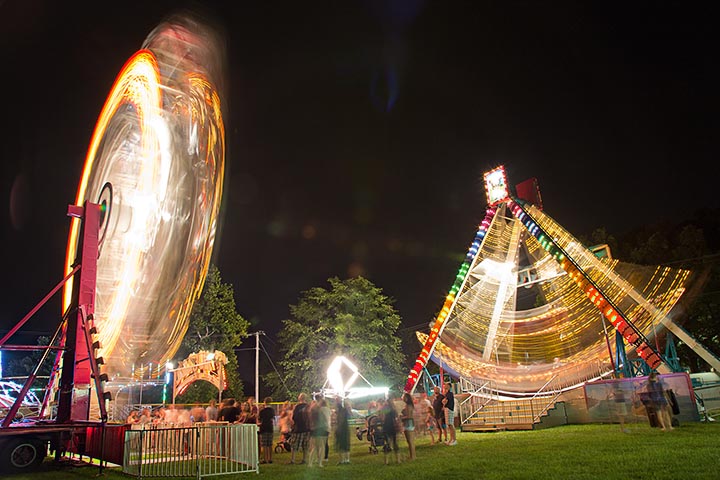 Long Exposure Photography at The Carnival
Canon 5D Mark III, 24-105mm lens at f/16 for 6 seconds.
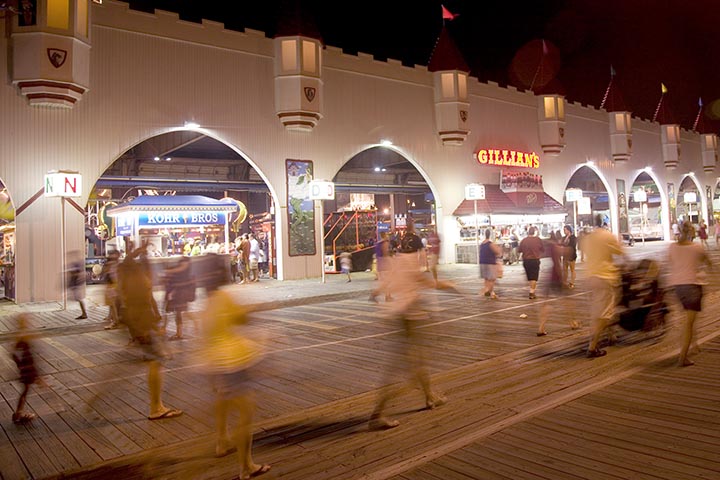
People sometimes come out looking like ghosts and gives you an interesting effect, especially when some people are moving and some are stationary during the exposure.
One of the first longer exposures I shot with my Canon 5D back in 2010 was this boardwalk photo below. People in motion, when photographed using a slower shutter speed, make for some interesting results.
When timed just right, even a shutter speed of 1/4 second will produce both stationary and blurred elements of moving people. People watching on the boardwalk at the Jersey Shore becomes even more interesting when you've got your camera and tripod along for the ride.
Long Exposure Photography Summary
The biggest thing to remember is that you'll be experimenting with adjusting your camera settings frequently when doing long exposure photography. Lighting conditions and the effect you want to achieve will vary a lot.
Your camera and its settings are so advanced that you'll be able to get some great shots. It just takes a bit of experimenting. The manual controlling of your aperture and shutter speed is a great way to learn. Neutral density filters are big help for daytime long exposures or for situations where you want an extremely long exposure.
As an Amazon affiliate Canon Camera Geek receives a small commission from qualifying purchases, at NO added cost to you.
Have a blast. Shoot a Canon.


Bruce Lovelace is the publisher of Canon Camera Geek. Read more about him on the About Page. He also publishes how to articles and camera gear reviews at the Photography Tips website.
View some of Bruce's photos on Instagram and Flickr. Join the tribe of followers on YouTube. Bruce also runs photo workshops and provides 1 on 1 digital photography coaching.
Recent Articles
-
Choose the Right Memory Card for Your Canon R6 Mark II: Speed And Size
Nov 05, 25 02:04 PM
R6 Mark II Memory Card -
Canon G1x Mark II vs G1X-Side By Side Comparison of Canon G1X Cameras
Oct 22, 25 08:35 AM
G1 X Mark II vs. G1 X: Is the New Version a HUGE Leap... Or a Massive Mistake? Canon responded to the criticisms of the original G1X. Canon G1X Mark II vs G1X -
Sony RX100 III vs G1x Mark II by Canon. Side by Side Comparison
Oct 22, 25 08:07 AM
It's another one of those epic camera battles, this time not the Canon vs Nikon but rather the RX100 III Vs G1X Mark II battle. -
Canon R6 Mark II FAQ. Answers To All of Your Canon R6 M2 Questions
Sep 01, 25 07:51 AM
There's a lot you can easily learn about Canon's mirrorless R6 Mark II camera. Get your questions answered in this R6 Mark II FAQ -
Canon G1X Sensor Size. What Are The Specs on The Canon G1X Sensor
Aug 26, 25 11:39 AM
Here is a comparison of the Canon G1X sensor size with the rest of the "G" series Canon cameras
